Front-end Deployment using React.js Made Easy with AWS Amplify
Understand the AWS Amplify service and learn how you can quickly deploy a simple React application.

Abdullah Muhammad
Published on September 20, 2023 • 8 min read

Introduction
When working with web development, there are numerous options available for deployment. We found a quick and cheap way to deploy Vanilla JavaScript and React.js applications using GitHub Pages.
However, we will expand options and explore AWS. It would be a shame not to know some of the most common services AWS has to offer. You might be familiar or have heard of some such as EC2, S3, and so on.
There are over 200+ services AWS has to offer and there is no clear-cut way to go about deployment. There is no “perfect” solution so to speak.
We will focus on deploying a front-end, static web application that primarily uses React.js as its codebase. There are numerous services AWS offers that are capable of hosting both client-side and full-stack applications.
In future tutorials, we will explore each in detail. But for today, the focus will be on AWS Amplify.
AWS Amplify
AWS Amplify includes tools and features which enable for the development and deployment of front-end and mobile applications. You can quickly build and deploy full-stack applications on AWS using Amplify.
SPAs (Single Page Applications) using React.js and Angular are supported as well as SSR (Server-Side Rendering) frameworks such as Next.js.
Once a site is deployed, Amplify will use a certain format to assign a URL. You can assign a custom domain name to the site using any third-party service and integrate it using AWS Route 53.
There are two ways one can go about using Amplify:
- Amplify Hosting — Allows for the deployment of sites based on Git. You can host full-stack applications with integrated continuous deployment. This means that as soon as new code is pushed to the relevant branch responsible for hosting the site, Amplify will re-deploy the site using the new code.
- Amplify Studio — You can think of this as an IDE except it is for the cloud. From scratch, you can quickly design a frontend UI and a backend for communication and deploy the two together.
We will not dive into using Amplify Studio for this tutorial, but will instead focus on using Amplify Hosting.
For more information on Amplify Hosting, you can visit the official docs here.
Transitioning from Local Development to AWS
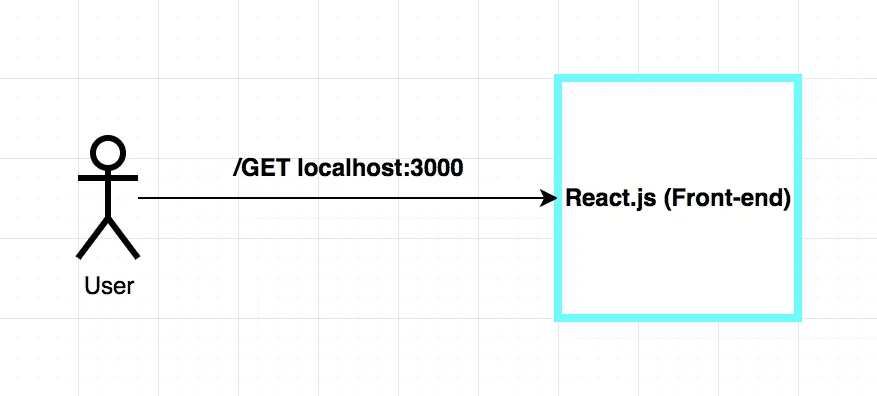
This is what the local development environment looks like when developing a website using React.js:
This is what the transition looks like when deploying to AWS using Amplify:
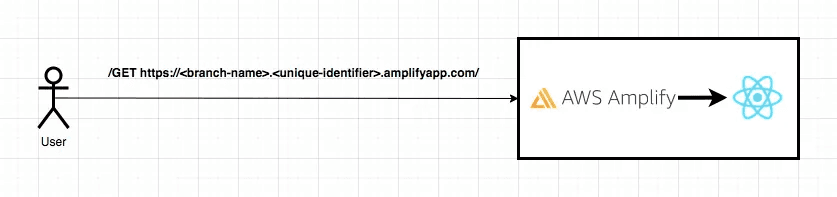
Pretty straightforward how this works. Every site hosted using Amplify follows a certain URL format:
https://<branch-name>.<unique-identifier>.amplifyapp.com/The branch-name is the name of the branch inside the code repository from which the code is sourced from. The unique-identifier is a random set of alphanumeric characters to uniquely identify the URL.
Finally, amplifyapp.com is the domain name that AWS Amplify uses for hosting.
Here is an example of a web application I built and deployed using AWS Amplify:
https://aws.d2n4l9is533l0n.amplifyapp.com — A site related to the Polygon chain ecosystem which is a side-chain to the Ethereum blockchain.
Safe to say, the URL looks messy and a convenient workaround we discussed earlier was to incorporate AWS Route 53.
This allows developers to purchase a custom domain of their liking from a third-party domain provider (provided it is available) and link that to their website instead of using this messy looking URL.
Local to AWS Walkthrough
This article assumes you are familiar and comfortable working with AWS. This includes account setup and components such as the billing dashboard and the AWS console.
We will not walkthrough setting up an account, it is assumed the reader already has created one.
To follow along, you can clone the following repository.
The README.md file contains the link to the deployed site, but we will walkthrough the deployment process again.
As mentioned earlier, the codebase for designing this website is the same as what was used in the React.js + GitHub Pages tutorial.
The only difference being the switch from Hash Router to Browser Router.
Login into AWS and navigate to the AWS Console. Once there, search for AWS Amplify and you should see the following:
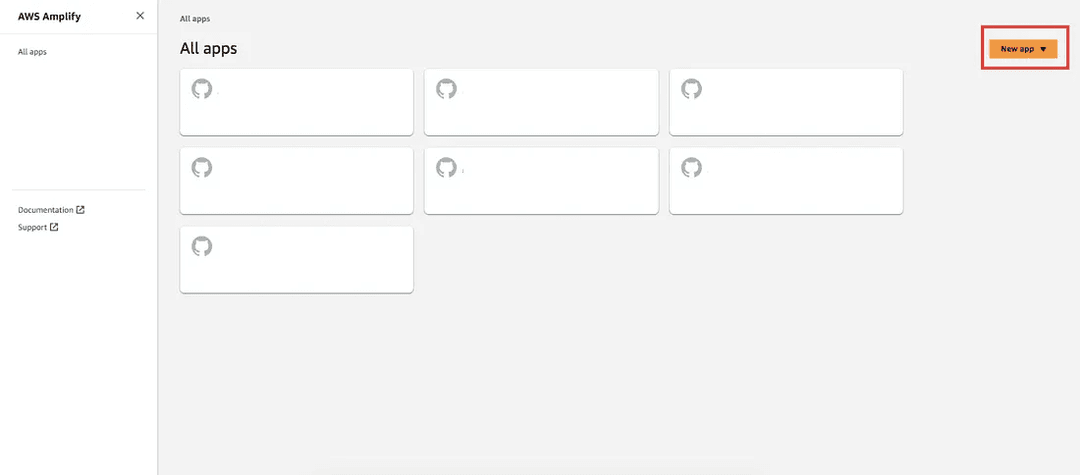
We proceed by clicking the New app button and selecting the Host web app option.
Note: For privacy reasons, I have inked out the names of the apps. If you deploy any sites using Amplify, they will be listed here.
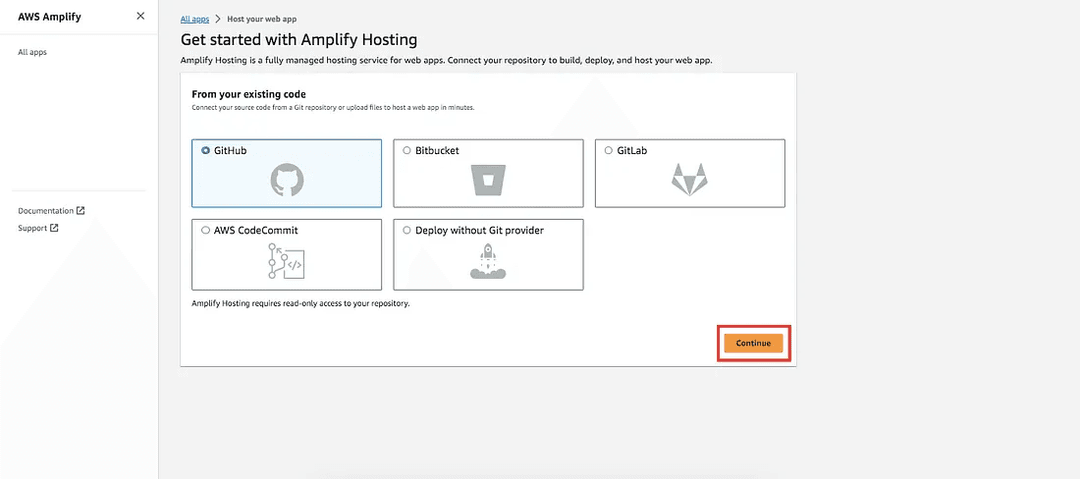
Here, we select the GitHub option and proceed to continue.
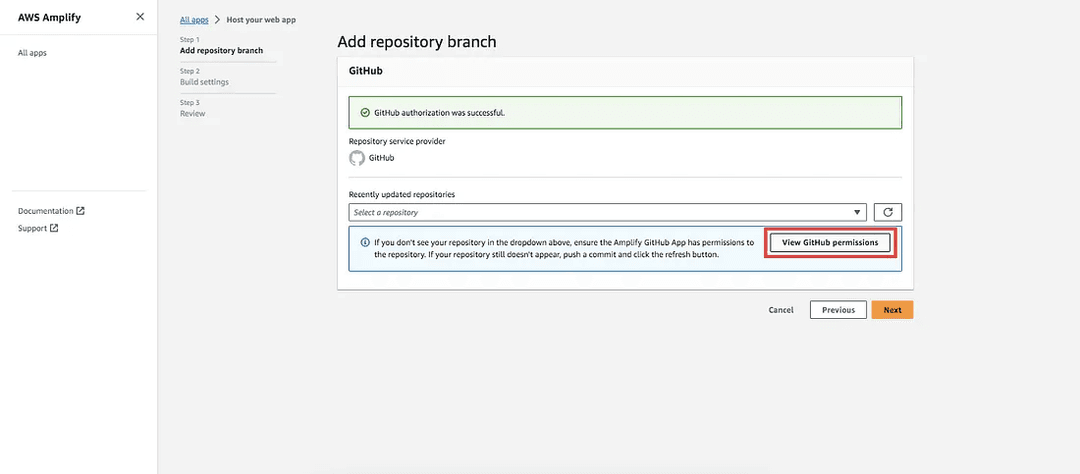
If you are using Amplify the first time, you will not find your repository here. So proceed to select the View GitHub permissions.
You will need to link your GitHub account to AWS:

Select configure to proceed. If you have any MFA or two-factor authentication enabled, you will be prompted to provide those.
Once you are through that, GitHub will provide options for enabling AWS Amplify access:
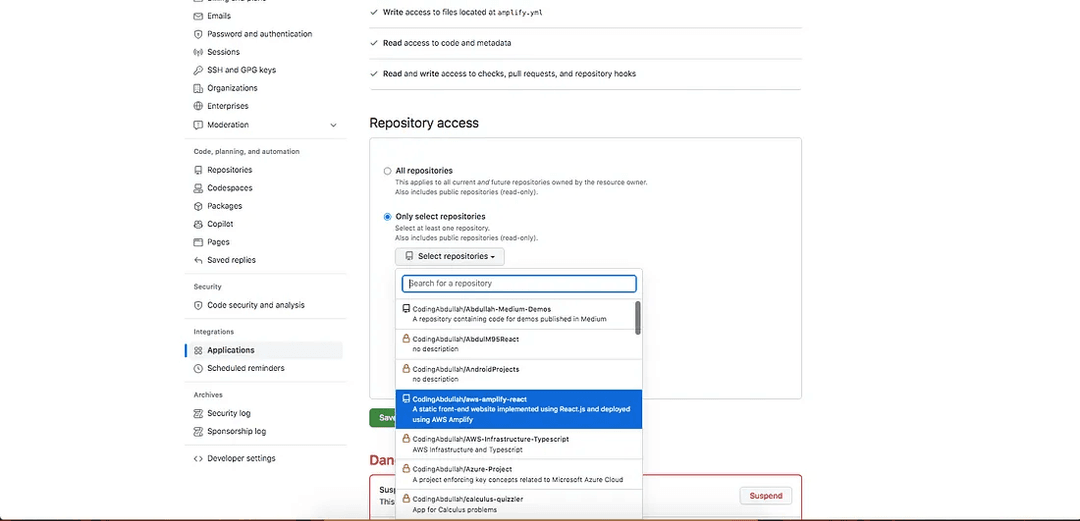
In my case, I chose Only select repositories and because the repository is named aws-amplify-react, I select that repository for enabling access and select Save.
Switching back to Amplify, you should be notified that authorization was successful and notice that your repository is available for use:
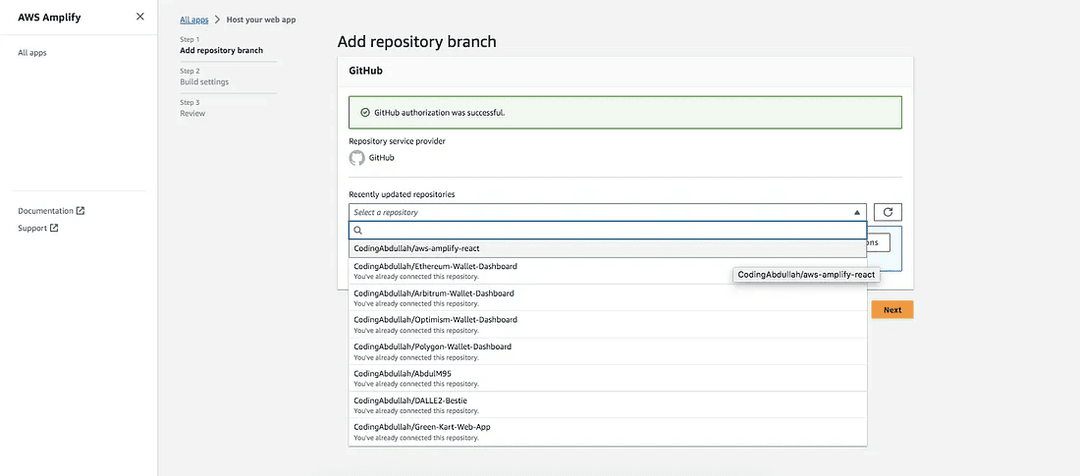
After selecting it, you will be prompted to select which branch to deploy from.
For simplicity, there is only one branch to this repository (main). If you want to create your own code branches and deploy those, they will be listed here:

Once all that is complete, proceed by selecting Next.
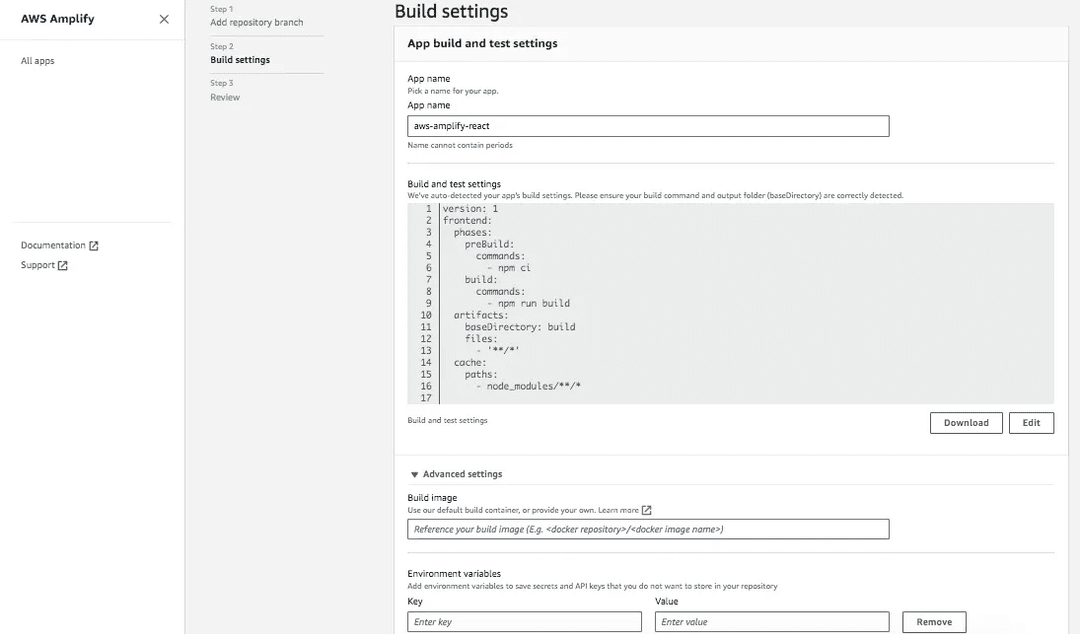
Here, you will be prompted to configure build settings. You can provide a custom name to your application as well as environment variables needed to successfully run the web application.
We covered working with environment variables using the .env package here. We do not have any for this application, so we leave this blank:
If you are comfortable with the settings, proceed by selecting Next.
And finally, review the steps prior to deployment:
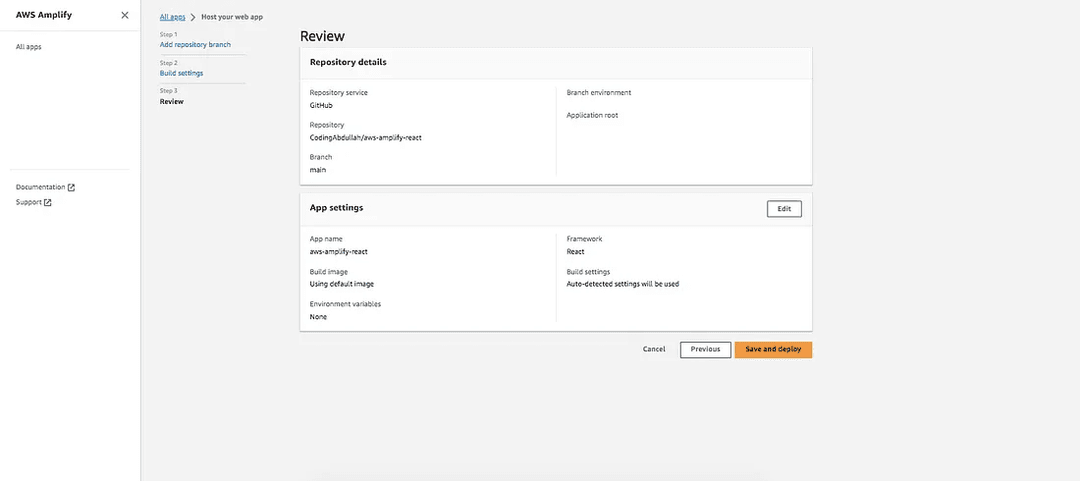
Amplify is smart enough to detect what framework is being used in the codebase. As noted in the App settings section, we are using React.
All good here so proceed by selecting Save and deploy. You will notice a screen that looks like this which details the three stages of deployment:
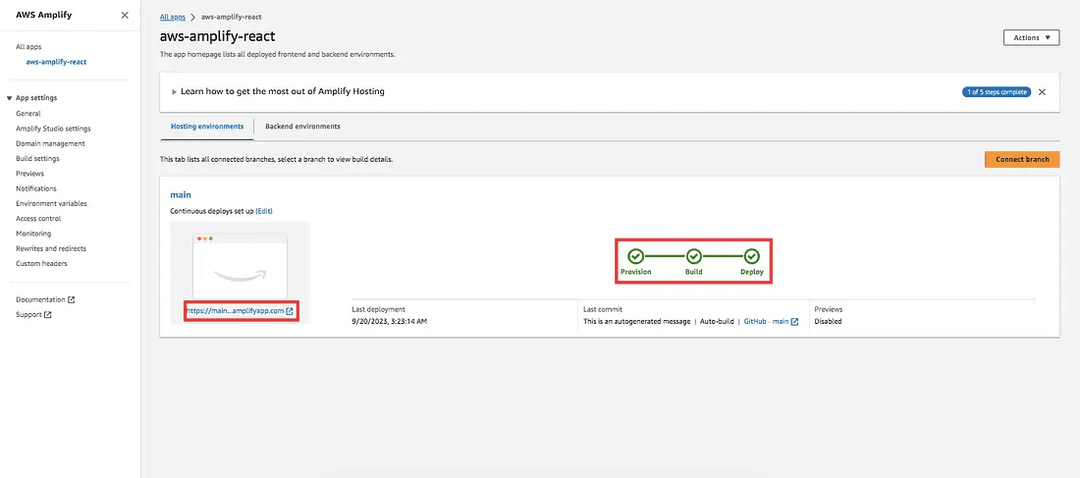
If deployment was successful, each of the Provision, Build, and Deploy stages should be marked with a green checkmark. Any stage that encounters an error will stop deployment and be highlighted with red x.
The URL to the deployed site is under the website logo to the left. At the time of deployment, the URL assigned was the following:
https://main.d2t8oxlcaougog.amplifyapp.comThat is still the case. The site is live if you want to visit it, but for your deployment, the URL will be different.
And that is pretty much all there is to it. Remember, any commits pushed to this code repository and branch, will prompt Amplify to re-deploy the entire site. We discussed earlier that continuous deployment is supported when working with Git-based workloads.
We can now proceed to demo this live website to confirm everything works the way it should.
Demo
Navigating to the link above, you should see the following:
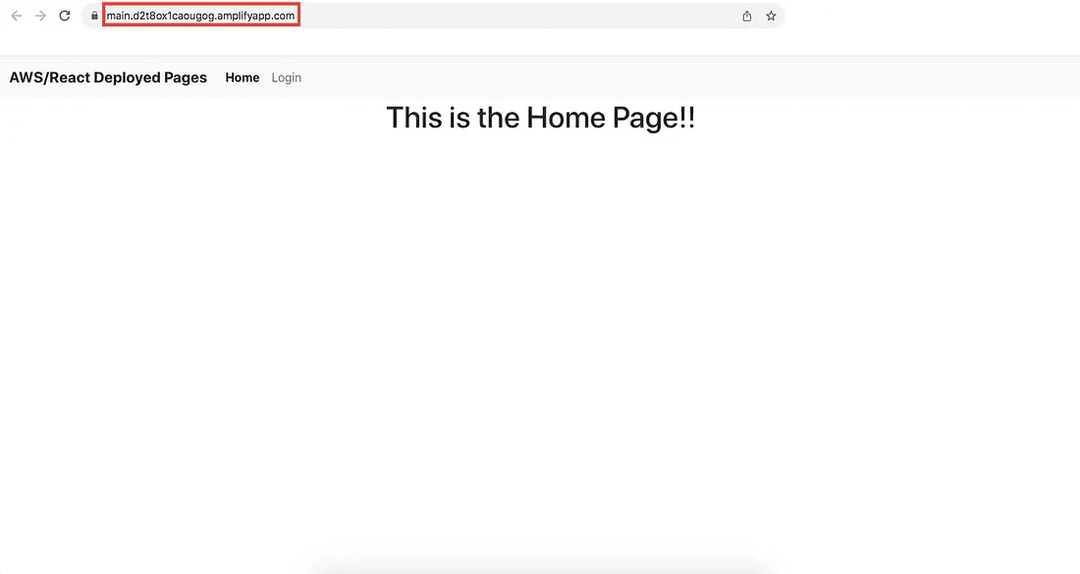
The URL is secure and the home page of the website is the same as before.
Now proceed to the login section of the application. Fill out the form details and select Submit:
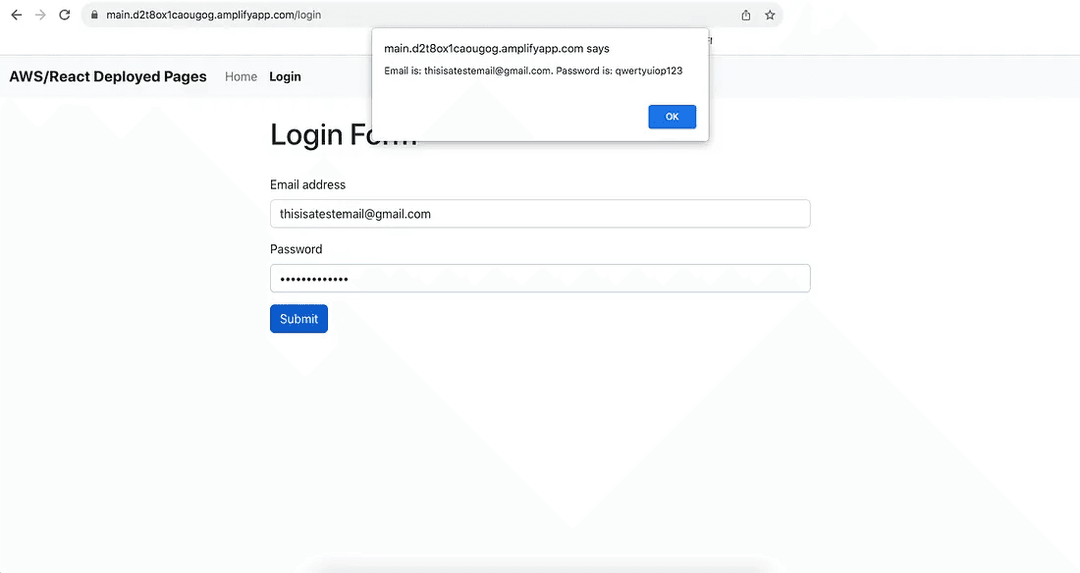
Just like before, the form details from the login page are displayed to the user as they are submitted.
Notice the styles and Bootstrap classes incorporated in the codebase are deployed as is. We did not add any additional configuration other than setting up deployment.
The URL, SSL certificate, and site deployment were features given to us by Amplify. That is the beauty of AWS.
Conclusion
We could have assigned a custom domain using AWS Route 53 as mentioned earlier, but it would cost money and for a small site such as this, it is not worth the time.
AWS makes things very easy and provides options for seamless deployment.
We saw how easily one can interact with AWS using their GitHub account and provide access to code repositories for deployment.
AWS Amplify offers additional features that we did not dive into such as designing, developing, and deploying a full-stack application using Amplify Studio.
For a future tutorial, we might look at that. But today, we wanted to explore the fundamentals of AWS Amplify.
In the list below, you will find links to the GitHub repository and the official AWS Amplify docs.
I hope you enjoyed learning about AWS Amplify and look forward to more articles in the future.
Thank you!