Server-Side Rendering (SSR): One Server for All the Heavy Lifting
Develop web applications that use SSR with Node.js and various template engines such as EJS.

Abdullah Muhammad
Published on August 8, 2023 • 9 min read

Introduction
So far, we have looked at full stack development using two servers. We saw how the MERN Stack incorporated JavaScript for both front-end and back-end development.
But what if you could do everything with just one server, is that possible? Indeed it is and today we will be focusing on that.
For the most part, a back-end server is responsible for a lot of the heavy lifting in a web application. This includes things such as fetching data from an API, database operations, authentication, and so on.
A front-end server does important things as well, but for the most part, the front-end is concerned with the view and nothing else.
We could in theory, enable the back-end server to render pages as well and completely do away with a front-end server. This is called SSR or Server-Side Rendering.
SSR: Server-Side Rendering
Server-Side Rendering or SSR is the ability of a back-end server (server-side) to render pages to the user. The idea is to have HTML pages with embedded code which dynamically renders data to the user.
Rendering data dynamically could be based on anything such as form validation, successful login or logout, notifications, and so on.
Since we are using Node.js for the back-end server, there are a couple of features which we will need to set in order to render pages successfully. The concept of SSR is not limited to Node.js though, popular languages such as Java also enable developers to do the same.
If you have worked with Java before, you might be familiar with Servlets and JSPs. A Servlet is essentially the back-end server in a Java web application and the Java Server Pages or JSPs for short, contain simple HTML text with embedded scripts for conditional rendering.
There are several libraries out there which can be used to embed code inside of HTML files and these are often referred to as template engines.
Template Engines
What are they? These engines are crucial for building non-static HTML pages.
"What do you mean non-static HTML pages?"
The difference between static and non-static is that content does not change in the former, but does in the latter.
An example of a static website could be a personal website. This is often a one and done site with changes happening periodically to update information about you. You could therefore host it using HTML files and change them periodically to reflect changes and you are good to go.
But often times, you will be working with pages that need to change dynamically and if you insist working with HTML, there needs to be a way to accommodate this.
Rather than build hundreds of HTML files for each condition, incorporating a template engine enables you to build a single HTML file which can sufficiently render HTML content in any scenario.
A template engine allows you to build non-static HTML pages and render text based on data. They can be considered text processors and as separate programming languages which are easy to pick up.
There are several engines out there, but the focus for today will be on EJS.
EJS: Embedded JavaScript
EJS is the most popular template engine in the market right now. There are other popular ones out there such as Pug and Handlebars, but EJS has quickly become the community’s favourite.
In fact, if we look at the download trends for each of these template engines, we find the following:
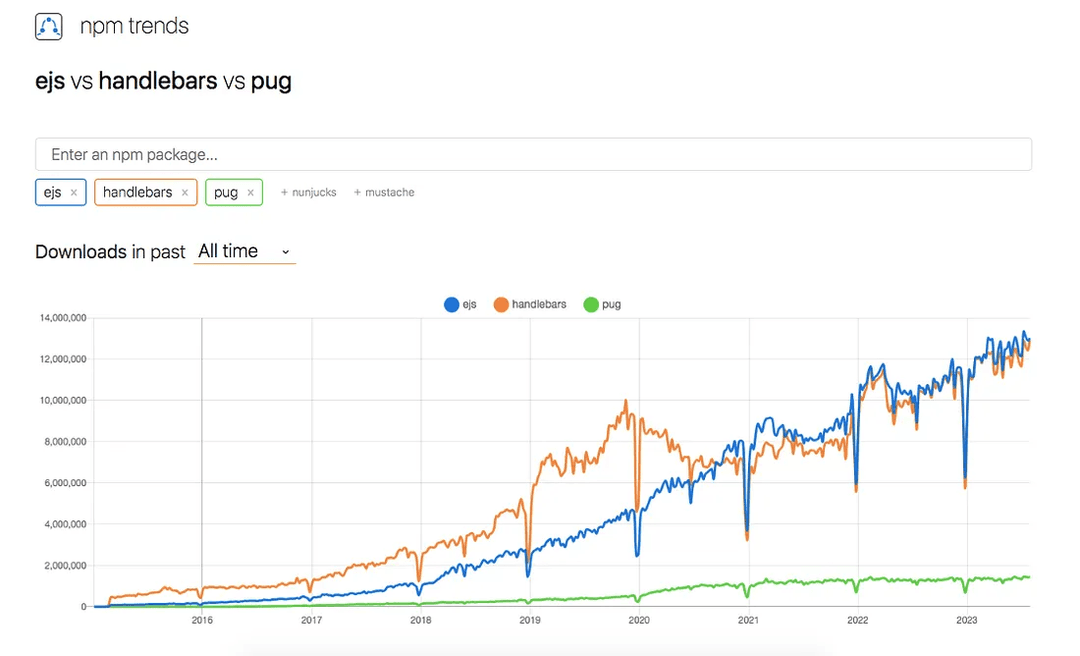
Link to the chart above is here.
These engines are npm packages which can be installed using npm install and off you go!
Each template engine works in a different way, but what makes EJS so unique is that you literally write JavaScript word-for-word inside your HTML files using syntax specified by EJS.
This seamless integration is why EJS is preferred over other template engines.
We will not dive deep into every aspect of EJS syntax, but will cover the most common ones.
Files that work with EJS will have the .ejs extension and will look very similar to typical HTML files with JavaScript embedded in it.
We can modularize certain components of the HTML files such as the head section and include them using standalone features EJS provides us.
For setup, we do the following:
- Set the back-end server view engine to EJS
- Make sure the EJS package is downloaded globally
- EJS files to be rendered must be in a folder called views
- Modularized components of an EJS file must be in a folder called partials (such as head and footer)
- Images, styles, and so on belong in a folder called public
- EJS files inside the views folder can rendered using the built-in Route GET method provided by Express.js
When we set the back-end server to listen on a particular port, we can navigate to any browser and search that port on Localhost.
From there, the page to be rendered on the default route, / will be visible.
Code Overview
You can follow along with the demo by cloning this repository.
The directory we will work with is /demos/Demo08_Server_Side_Rendering. There is only one server folder for this demo (as discussed earlier). If you are using VS Code, you should see the following setup:
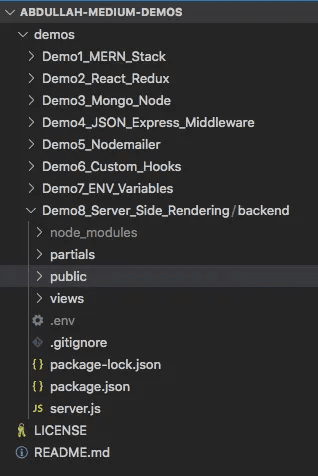
We have the necessary folders in place along with the main server.js file. As we have seen in previous demos, most of the code for the back-end server remains the same except for some changes:
We set up the server to run on port 5000 (specified in a .env file), set the view engine to EJS, set the location of where the public folder is, and defined the routes within the web application.
As you can see, we have three routes: /, /information, and /api-information.
You will notice that these look very similar to the controller functions we had created in previous demos and that is indeed the case.
We are directly programming the back-end server to deal with these routes and we render specific pages using the render() method.
In previous demos, we returned raw JSON back to the client, but in this case, we render actual data (EJS files) to the screen.
We also pass a second argument, which contains data to be used by the EJS file to help render the page.
For each of the three routes, here are the respective EJS files inside the views folder:
Looks very comfortable to read does it not? In EJS, you can split your page into components which allows you to include sections of code using a single line rather than having to re-write the same code over.
There is a special function called include() which takes in two arguments, the location of the file to be included and any data that must be passed along to help render that page.
You can see we have three partials that are included in each of these views:
- Head section of the HTML page
- Navbar to be displayed on each page
- Footer section to be displayed on each page
Here are the three partials inside the partials folder:
Rather than having to re-write all this code in each EJS file, we can modularize the codebase and have them included using the include() function provided by EJS.
EJS Tags
EJS incorporates simple syntax which makes embedding JavaScript easy.
For include statements, we used these tags: <%- -%>. These basically output the unescaped value into the template.
We can include embedded JavaScript inside HTML code using these tags: <% %>. Important to note, every line of embedded JavaScript code must be encapsulated by this notation.
If we want to access data provided by the render() method inside any EJS file, we must use these tags: <%= %>.
We see all this in action inside the data.ejs file in the /api-information route. We are doing the same thing as before when it comes to data fetching.
Using the Axios library, make a request to fetch cryptocurrency related data and depending on the response, conditionally render data.
After that, we use embedded JavaScript and access all the data the server provides inside the data.ejs file. We conditionally render a table containing all the information.
For more information on tags using EJS, please refer to the official documentation.
Demo Time!
Alright, it is time for a quick demo! We will kickstart the one and only server and run through each of the links to double check if everything works the way it should.
I will be running the demo on port 5000, but you can choose which port you would like to listen on (specify in a separate .env file).
Since this is a back-end server, you will need to manually navigate to localhost:<port> on any browser of your choosing.
After running node server.js, you should see the following:
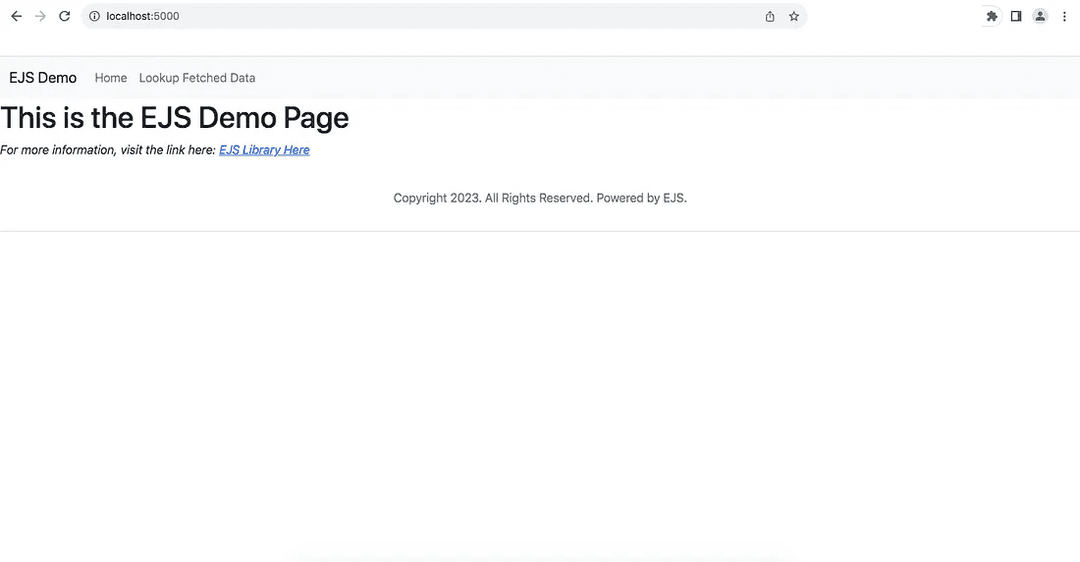
You can see the same HTML content on screen as what was written inside the EJS file for the default route.
You can also see dynamic content such as the year in the footer section displaying correctly.
If you navigate to home, you should see the following:
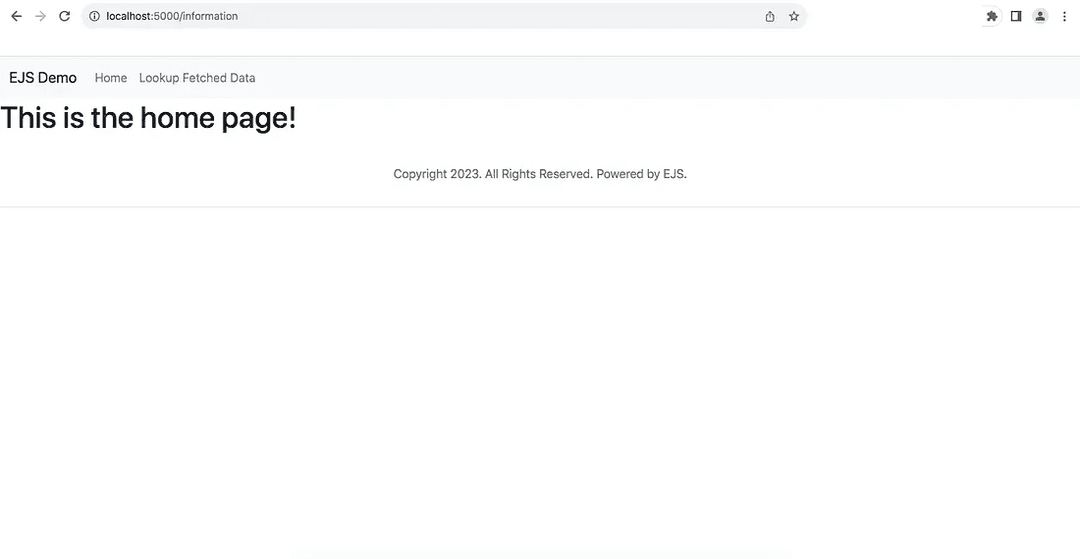
We only had one <h1> tag here so that takes care of that! Finally, if you navigate to the fetched data section, you should see the following:
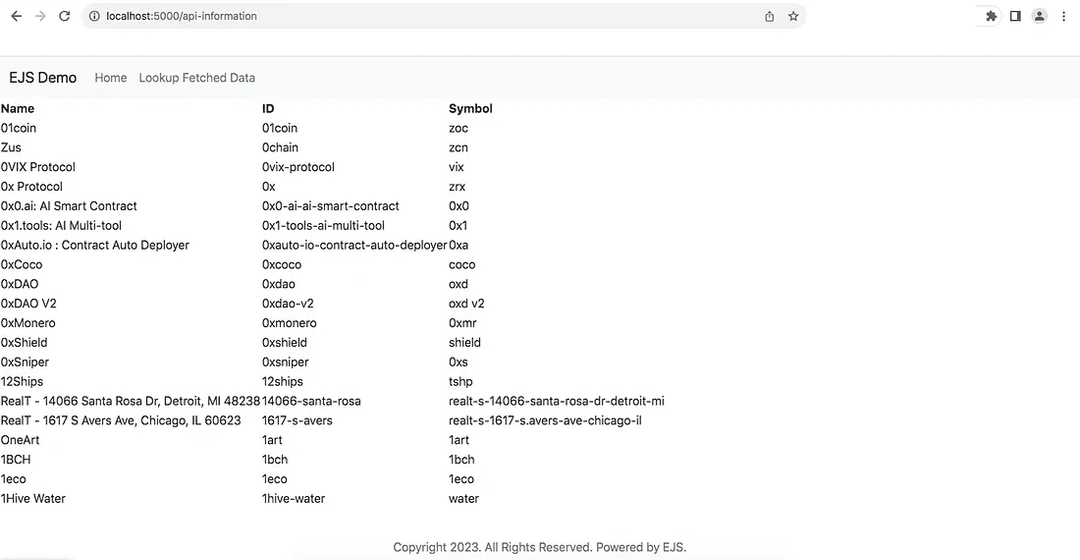
The table defined inside the data.ejs neatly displays all the API data that was passed to it by the back-end server.
This is EJS in action. We define the raw HTML file but where necessary, conditionally render that data based on a particular result.
For instance, if we had an error, no table would be displayed. We would simply see an error message instead (see data.ejs file).
That is all!
Conclusion
All in all, we did a deep dive into Server-Side Rendering or SSR for short.
We learned about template engines and how there are several of them out there including EJS, the most popular one.
We briefly touched SSR in other programming languages namely, Java and how the concept is not limited to Node.js.
SSR can be a good starting point for building non-static web pages, but the options in web development as we have seen, are aplenty.
In the list below, you will find the Github repository used in this article:
I hope you enjoyed this article and look forward to more in the future!
Thank you!