React State Management and a Deep Dive into Redux
Incorporate the Redux library into your React applications and learn about the global state store, actions, and reducers.

Abdullah Muhammad
Published on July 9, 2023 • 9 min read

Introduction
Last week, we covered the MERN stack and how the web development process could be streamlined using it. This week, we will dive deep into React state management and see how it can be enhanced using ancillary libraries such as Redux.
We will be using a full stack application for this demo and have a database included in it. The backend will be a Node server and a multi-cloud database service known as MongoDB Atlas.
React State Management
Anyone that has worked with React components understands the importance of state and how to maintain a good construct of it. This is especially true when working with complex, large applications.
State should always have a single source of truth. Say, you have a parent component (page) and multiple child components (table rows) that share common state. We can “pass down” this state through the use of “props” (properties) to each of these child components using the parent component.
Child components however, should not be able to modify this state on their own. Parent state should always be modified in one place only. Child components can have parent functions passed down to them to modify this state. Through this, you can see that, modification of parent state can only be through the use of parents’ functions. State is still only being modified in one place, hence a “single source of truth.”
Problem
But say you have multiple components that need to share same piece(s) of state. What is the solution? One could be that we design the application in a hierarchy, where the root component holds the common state and readily passes it down to its child components. This could work for a small sized application. But what about a large, complex one? You can quickly see how this becomes a difficult proposition.
Below is a diagram of what I am referring to:
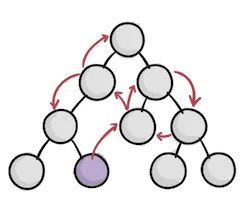
Passing state down from the parent to their immediate child components is not a bad idea (in this case, more efficient than the solution we will dive into). However, the design could be better if we are passing down state to the 3rd, 4th, …, nth-level child components.
Redux to the rescue!
Redux is an open-source library designed for Javascript. It is used for managing and centralizing state. It makes state, “global”. We have something known as a Redux store which consists of global state data which can be readily used by all components within the application and dispatch actions to modify the store’s data.
This does not mean we do away with component-level state. In fact, in most cases, you will not need to use Redux.
"So, when do we use Redux in a application?"
A good rule of thumb to use Redux is when we realize that the state we are dealing within the application is to be used by multiple components, especially state which cannot be “passed down”.
Here is a diagram showcasing a React application using the Redux library:
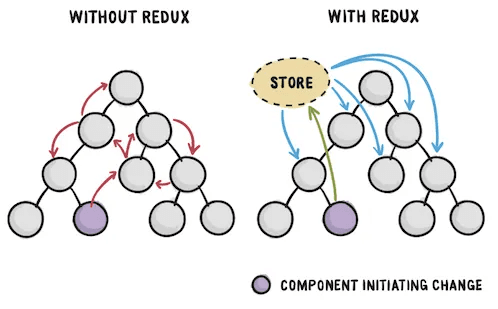
The state is much more organized and manageable. We still use the component-level state where necessary. But where required, move state to be used globally within the application to the Redux store.
We have a single source of truth and that is how state should always be managed.
"This sounds like a lot of work, what is the good use case?"
A simple example (and the one we will dive into the demo), is authentication. A large, complex application will have several components available/not available based on user authentication. This piece of state is global and cannot be passed down from component to component.
It makes sense to use Redux in this case and have authentication state sitting there.
"Why not store all application state in the Redux store?"
Many people argue that state management gets complicated with Redux. Believe me, if you have never used it, wrapping your head around it can take some time. You should strive to use component-level state and where necessary, apply the rule of thumb from above. You do not need to use Redux for all your application state :)
Redux Components: Store, Actions, and Reducers
There are three components to Redux: Store, Action, and Reducers.
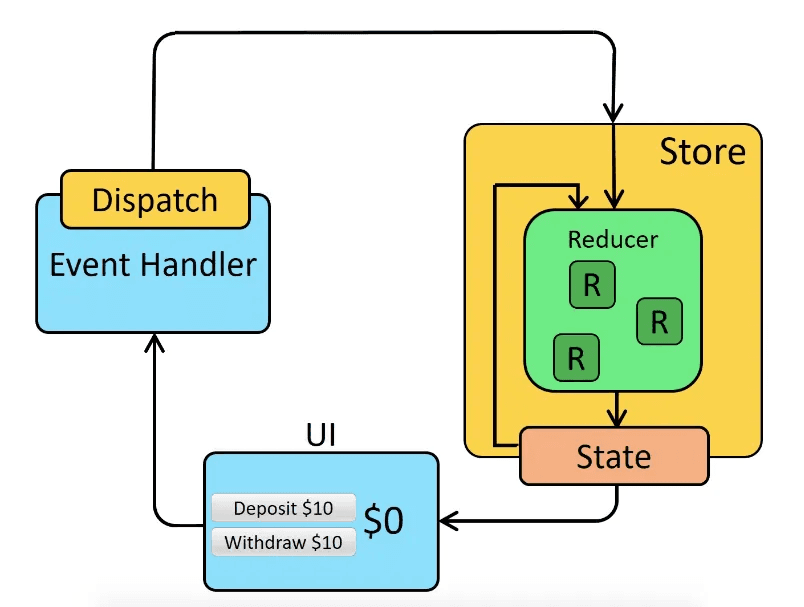
We dug deep into the store, but what about actions and reducers? Actions are essentially functions which are “dispatched” by components to request changes to data inside the global store.
Components cannot make these changes locally.
Based on a particular action, changes will take place within the global store. What/How changes are made is decided through the use of Reducers. These are pure functions that change the global store state data.
Here is a diagram illustrating what I mean:
This is essentially the gist of it. For more information, please refer to the official Redux docs.
Redux Toolkit
State management through the use of Redux toolkit is made simpler and uses the same concepts above. We will be using it in the demo.
Code Overview
Follow along by cloning this GitHub repository. The directory we will work with is /demos/Demo02_React_Redux.
For this demo, we will use an existing database with an existing user with their correct credentials.
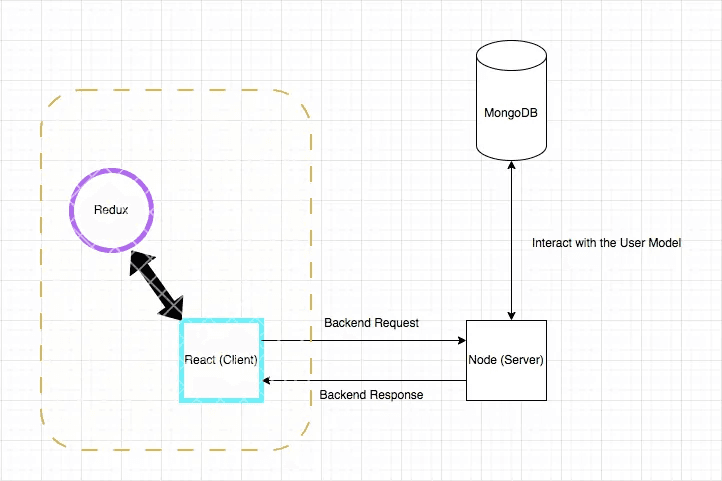
The following diagram illustrates what we are going to do:
Frontend Dive
For the frontend, we are making use of several libraries such as: React-Router, React-Redux, React-Router-Dom, and Redux.
React works as a single page application, the Router simply displays a different component based on a particular route, here is the main App.js file (/frontend/src/App/App.js):
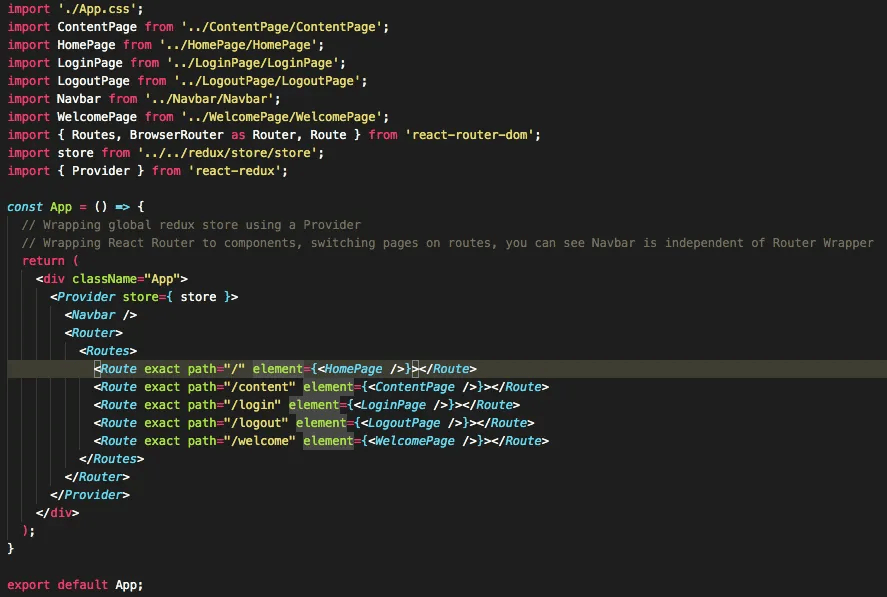
You can also see we are using a Provider to wrap the entire React application with the Redux Store.
The Redux store file is here (/frontend/src/redux/store/store.js):
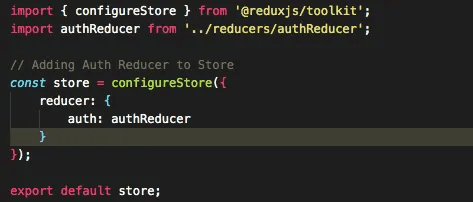
The configureStore() function takes in an object that maps reducers to their pieces of state. In the demo, we will work with one reducer consisting of user authentication state (authReducer).
Here is that reducer file (/frontend/src/redux/reducer/authReducer.js):

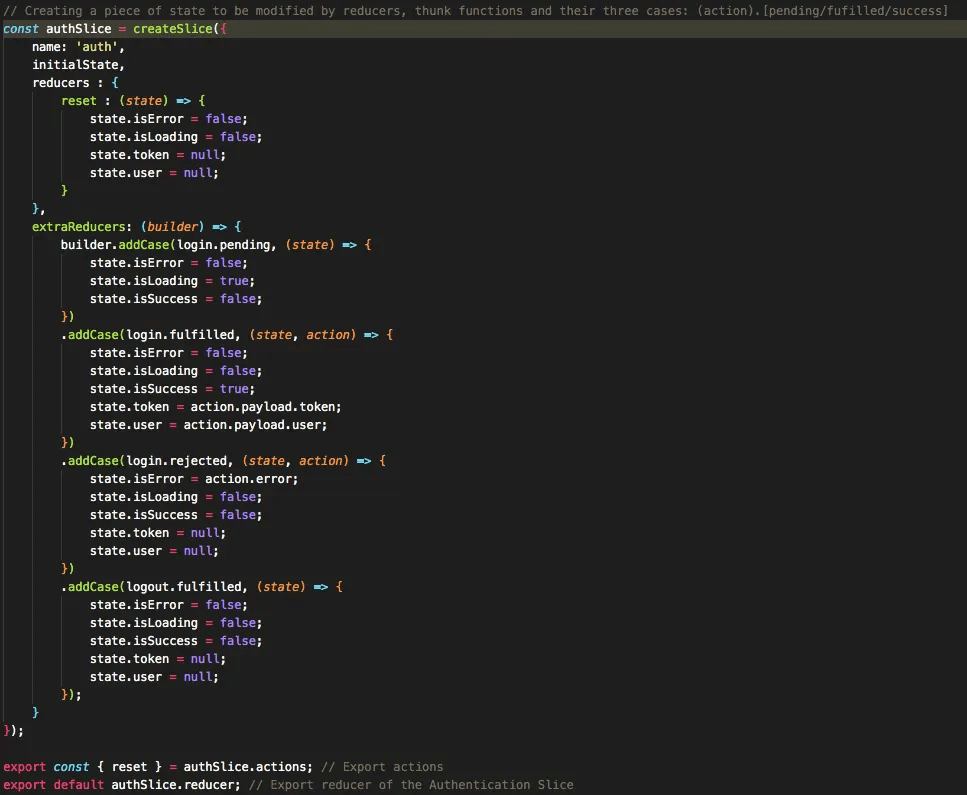
We are making use of two commonly used functions from the Redux Toolkit library: createAsyncThunk() and createSlice().
createSlice() is a function that allows users to create “slices” of their state (these slices are then combined into one using the Redux configureStore() function) and determine how this state will be modified when request to changes are made. Here, we have set the state to include user, token, and notifications.
createAsyncThunk() is a function that makes asynchronous tasks such as HTTP calls easier. Just know that it is used for tasks to be fulfilled sometime in the future. Here, have set the login, logout functions.
Thunk functions also produce three states: pending, fulfilled, and rejected. Within the slice function, we have a field for extraReducers. It is here where we determine, based on the result of the login/logout functions, how the state is to be modified.
For dispatching actions where we are making calls, here is the lone file (/frontend/src/redux/service/authService.js):
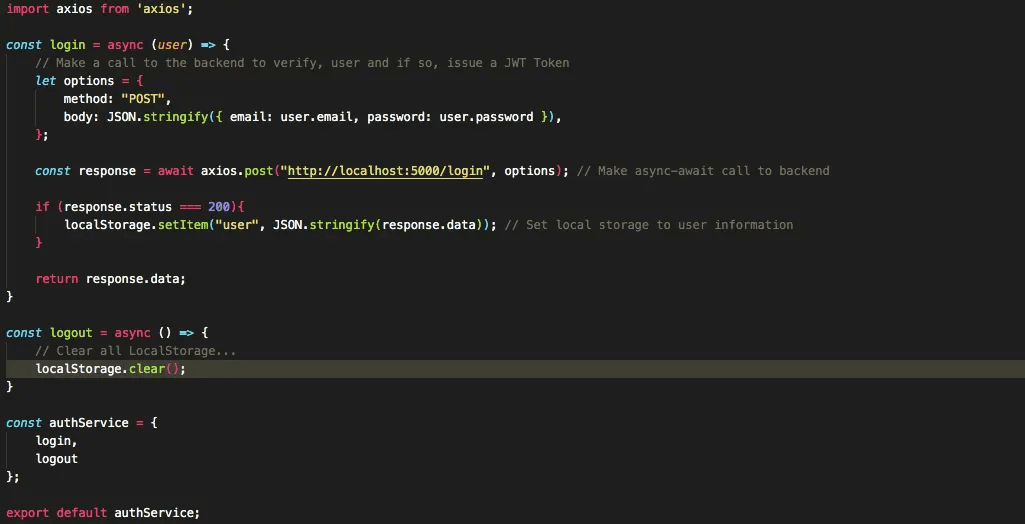
Here, we have the login and logout services and do things such as making a call to the backend to verify a user, obtain relevant information (JWT token, user information, etc.), localStorage handling, and return promises containing response data.
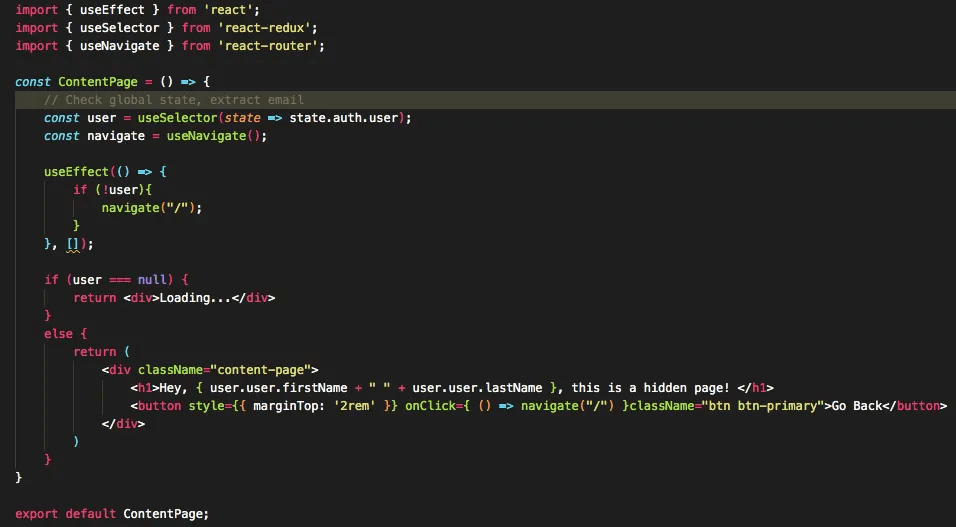
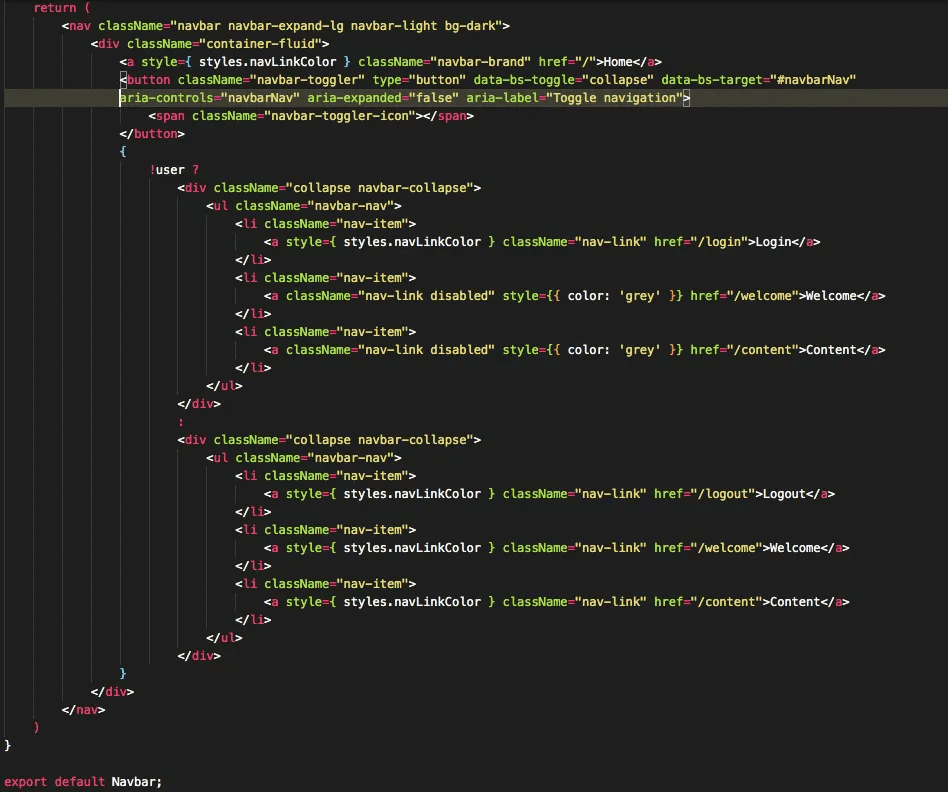
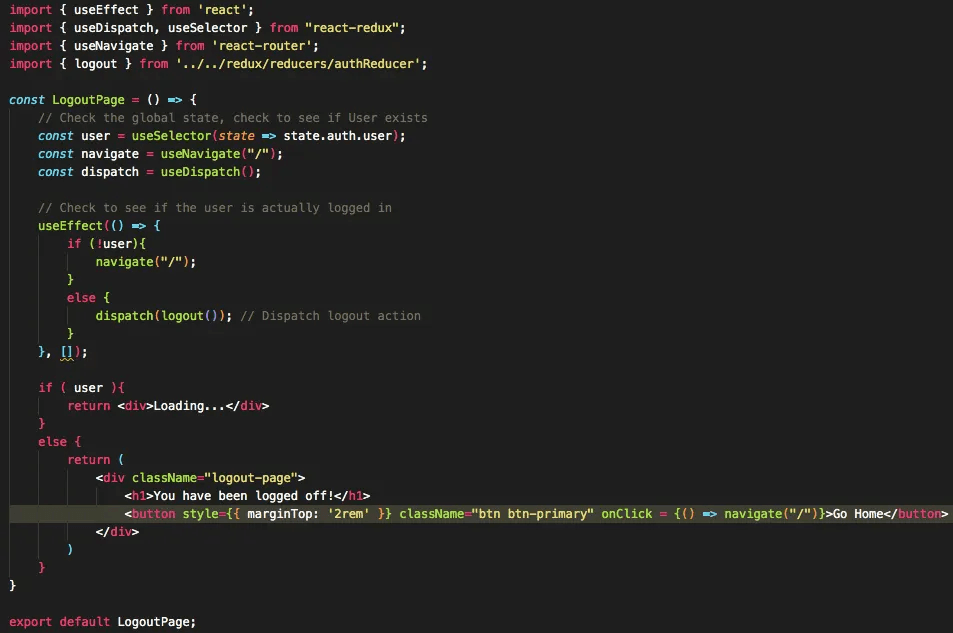
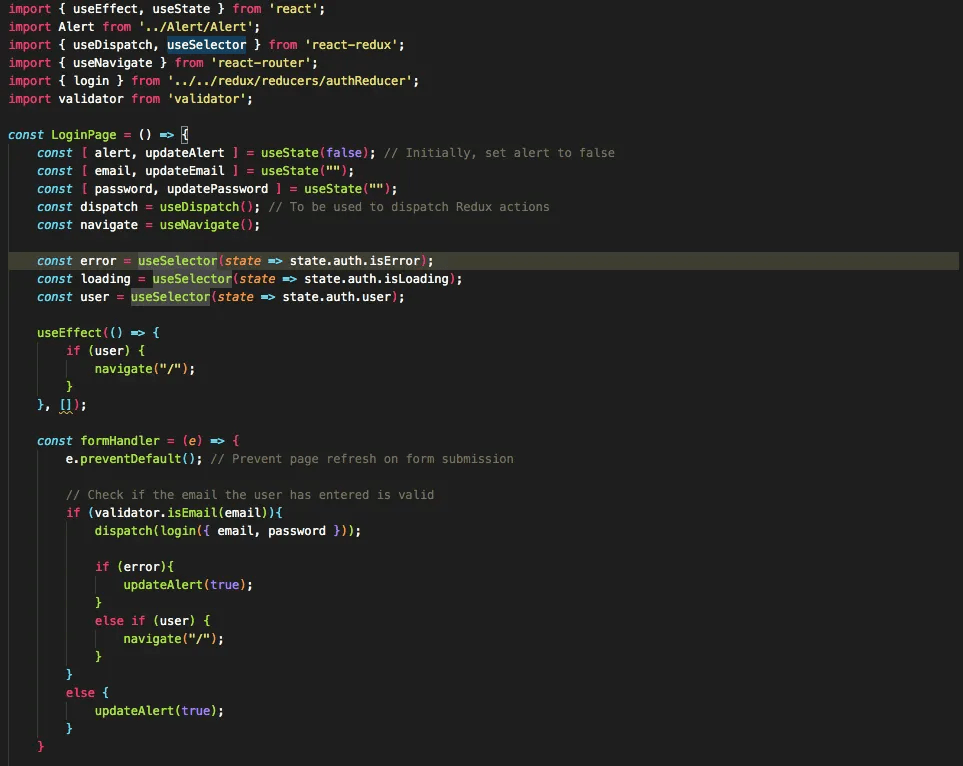
We mentioned that the global state should be readily accessible to all components in React. We use a common Redux hook called useSelector() to access the Redux store state. Here are the Login, Logout, Navbar, and Content pages. The last component more specifically, is only viewable when a user is logged in (all can be found under /frontend/src):
And much more. We are making use of one hook called, useSelector() to access store data and request to make changes to this data using the useDispatch() hook.
For the login page, depending on the result of the action, we either redirect user to the home screen (successful login) or show an error highlighting invalid credentials.
Backend Dive
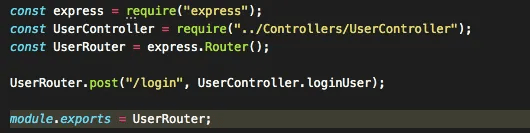
Phew!! The backend will be very short. We are making use of one Model representing the User, a Controller that verifies User credentials and issues a JWT token with an expiry date (with the User’s email as the payload sent back to the client server). All this can be found under /backend:
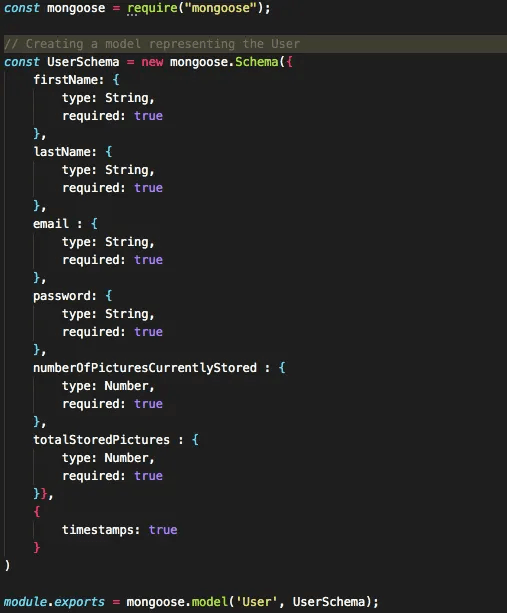
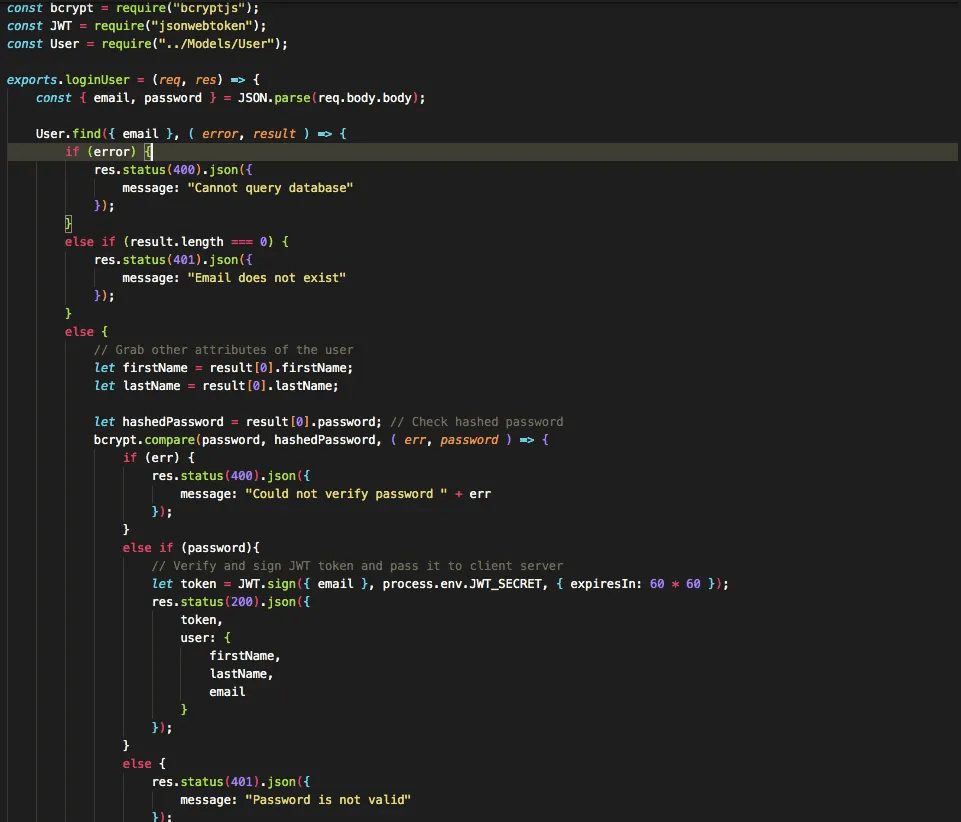
One thing to note here is that we are making use of an encryption library known as bcryptjs. It is NOT a good practice to store secrets as is, but rather have them salted and hashed before storing them into a database.
Should a database be compromised, sensitive data can fall into the wrong hands.
Not to go on a tangent, but hashing algorithms are one-way. We cannot decode a hash:
x → H(x)Bcrypt is one of the most secure hashing algorithms out there and very hard to hack. For every phrase out there, a unique hash exists for it. When we compare passwords, we check to see if their hashes match. We can intuitively conclude that the user entered the right password.
Once the comparison passes, we sign and issue a JWT token back to client.
And finally, here is the main server.js file:
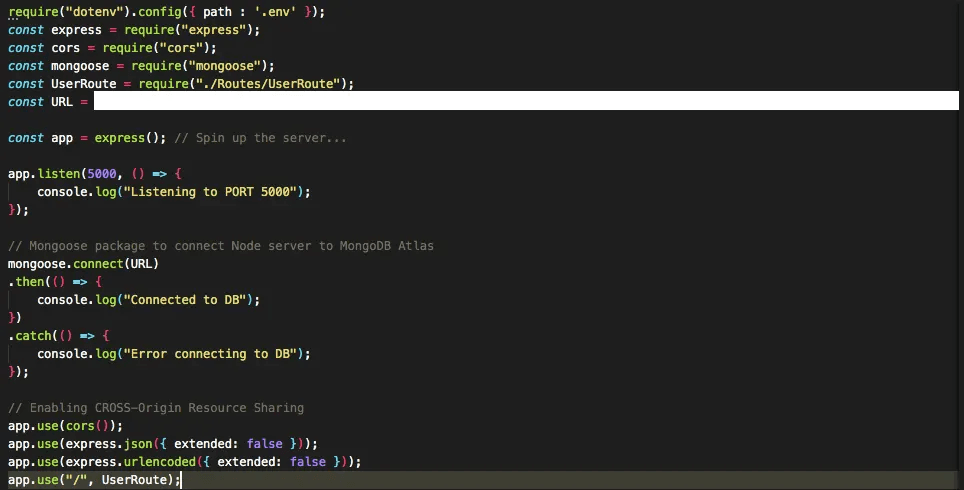
For privacy reasons, the connection string to this database was inked out. Feel free to create your own free cluster on MongoDB Atlas and simply add the URL they provide.
Demo Time!
As usual, we are running two different servers on two different ports. The frontend will run on Port 3000 and the backend server will run on Port 5000.
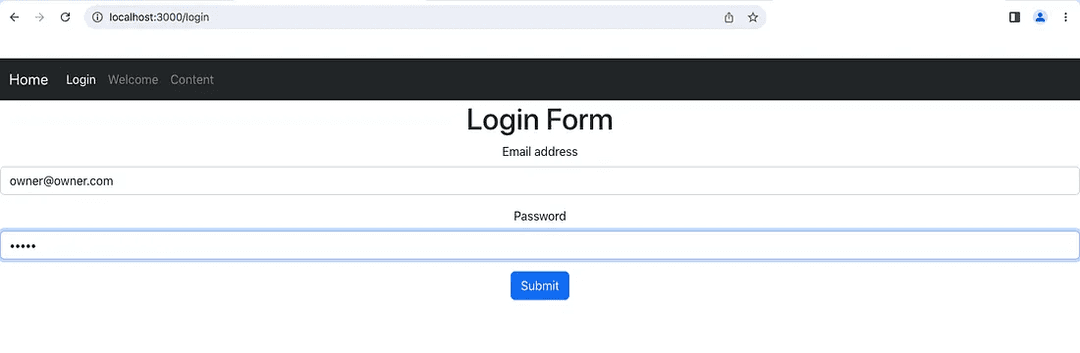
For this demo, we created a test user: owner@owner.com and a password: owner.
When you are running this application on your own, you can hard insert a test user document into MongoDB Atlas.
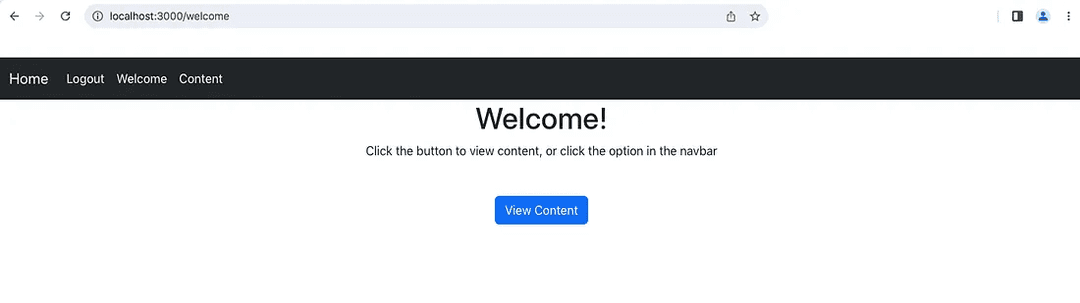
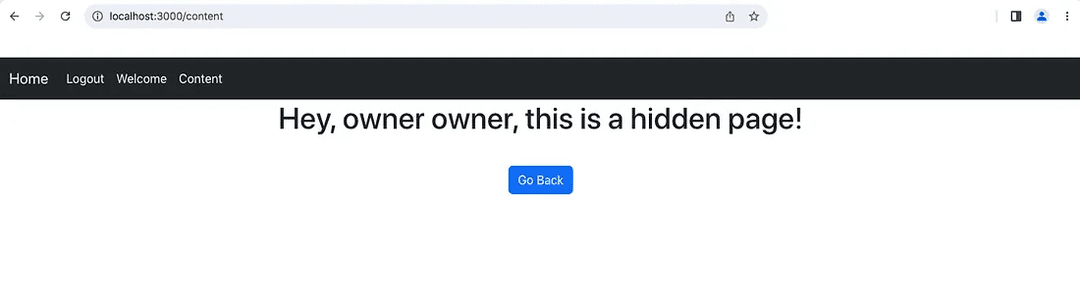
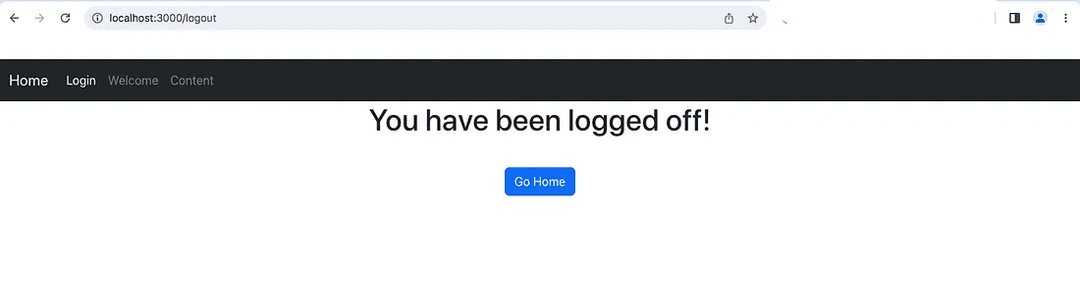
Assuming you use the same user as above, you should get the following in order:

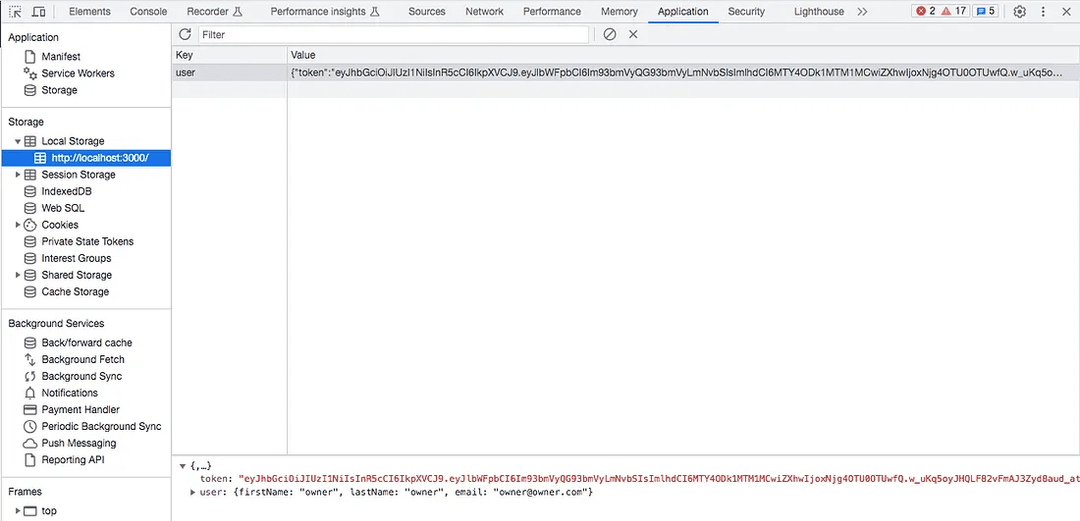
You can also see the Redux global state on the browser side. For Google Chrome, under More Tools > Developer Tools > Application:
And finally,
Conclusion
And that does it for this demo! There was a lot of ground covered in this article and a lot of it had to do with understanding Redux. State management is crucial to developing a scalable, erroneous-free web application.
There were a lot of key concepts covered so feel free to go back and lookup the relevant sections. You can also learn more about Redux using these docs.
I will link the GitHub repository here.
I hope you enjoyed this article and look forward to more in the future.
Thank you!